
To set up your vintage turntable for perfect sound, start by inspecting and cleaning all components, then place it on a stable, level surface. Attach and align the cartridge carefully, balancing the tonearm and setting the correct tracking force. Connect it properly to your audio system and calibrate the platter speed using a strobe disc. Regular maintenance and fine-tuning will boost performance—keep going, and you’ll discover all the essential steps for peak sound quality.
Key Takeaways
- Ensure the turntable is placed on a stable, level surface to minimize vibrations and resonance.
- Properly align and adjust the cartridge and stylus using a protractor for accurate tracking.
- Balance the tonearm and set the correct tracking force with a gauge to prevent record damage.
- Calibrate platter speed with a strobe disc or app, adjusting pitch control for precise RPM.
- Connect cables securely, ground properly, and perform regular maintenance for optimal sound quality.
Unboxing and Inspecting Your Turntable

When you open the box, carefully remove the turntable and all its components. Inspect each piece for any damage sustained during shipping. Pay close attention to the stylus; if it looks worn or damaged, consider a stylus replacement before use. Next, gently remove the dust cover, if attached, to check for cracks or scratches. Handle the dust cover carefully to avoid additional damage. While inspecting, verify all screws and connections are secure and intact. Take note of the tonearm and platter for any misalignments or debris. This initial inspection helps you identify any issues early. Properly handling the dust cover and checking the stylus sets a solid foundation for a smooth setup process and excellent sound quality. Additionally, consulting proper setup techniques can ensure optimal audio performance from your vintage turntable. Being aware of technological advancements in turntable design, such as anti-skate mechanisms and adjustable tonearms, can further enhance your setup experience. Paying attention to the alignment process is also crucial for achieving the best sound reproduction and minimizing wear on your records. Understanding gadget maintenance can help prolong the lifespan of your turntable components and maintain sound quality over time.
Setting Up the Turntable on a Stable Surface

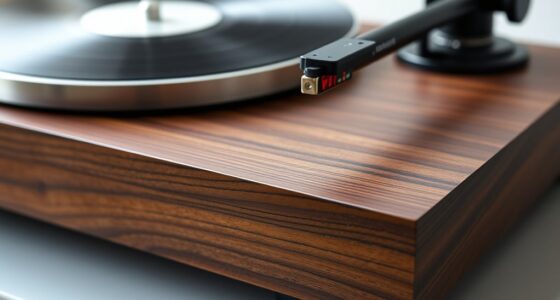
To guarantee ideal sound quality and prevent unnecessary vibrations, it’s vital to place your vintage turntable on a stable, level surface. A sturdy surface minimizes vibration transfer, which can distort sound. Choose a surface material that absorbs vibrations, like wood or dense composite, instead of hard, resonant materials like glass or metal. Confirm the surface is flat and steady; even slight tilts can affect tracking. Avoid placing the turntable on shelves that wobble or surfaces prone to vibrations from nearby equipment. Use a spirit level if needed to check for level placement. Proper surface selection and stability are essential for vibration reduction, helping your turntable deliver the clearest, most accurate sound possible.
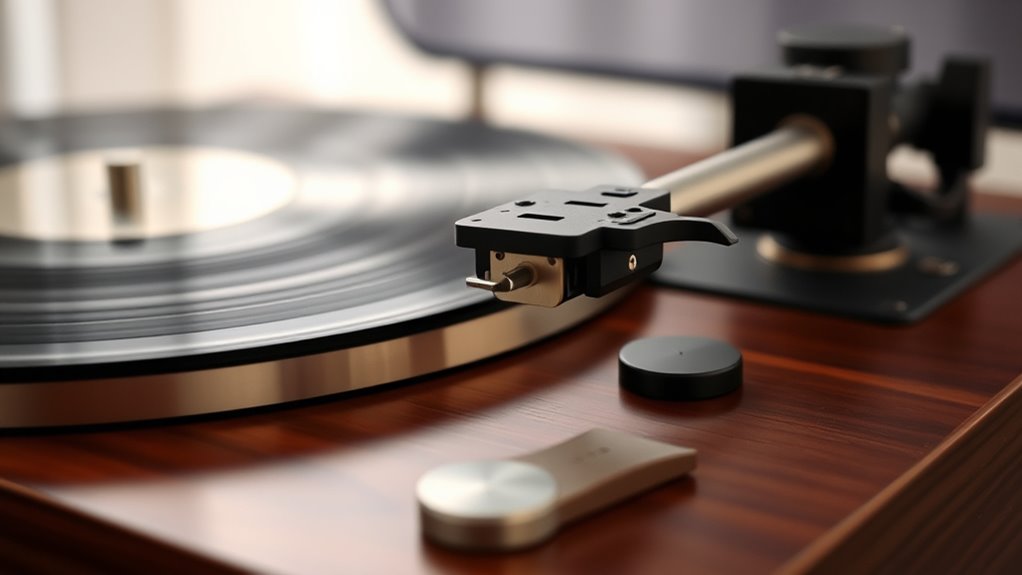
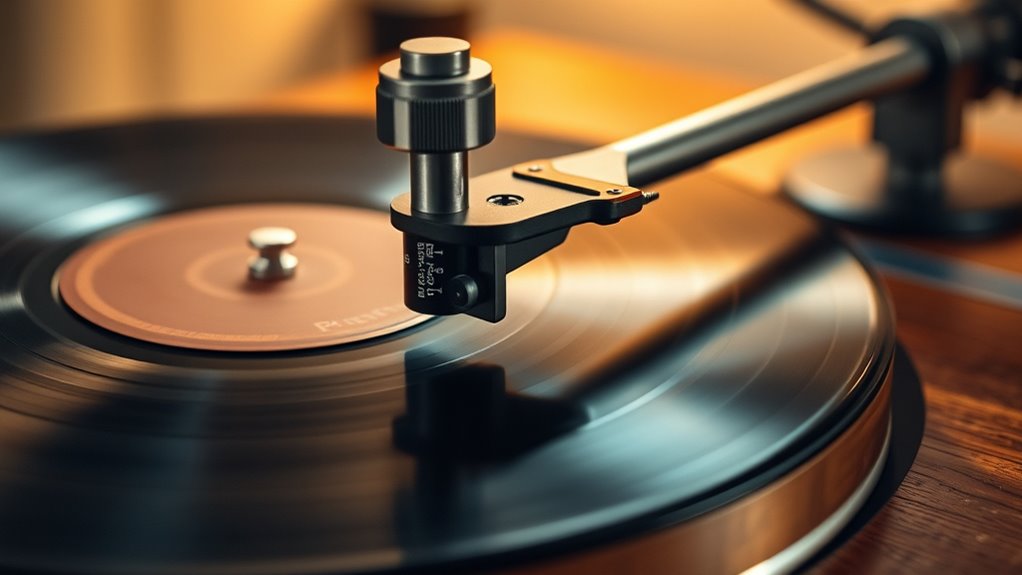
Installing and Aligning the Cartridge and Stylus
Installing and aligning the cartridge and stylus is vital for peak sound quality and record preservation. Begin by carefully attaching the cartridge to the tonearm, making sure it’s secure. When replacing the stylus, handle it gently to avoid damage, and verify it clicks firmly into place. Proper cartridge alignment is essential; use a protractor tool to position the cartridge so the stylus sits perfectly in the record groove. Misalignment can cause uneven wear and distorted sound. Take your time to check the stylus’s angle and position, making adjustments as needed. Accurate installation and alignment ensure your turntable delivers clear sound and extends the lifespan of your records. Always double-check your work before moving on to the next setup step. Additionally, understanding how data analytics can help monitor and optimize your turntable setup can lead to better performance and longevity. Proper calibration not only enhances sound quality but also helps in zodiac compatibility, which can influence your overall listening experience by aligning your setup with your personal preferences. Incorporating mindfulness techniques during setup can also help maintain focus and precision throughout the process.
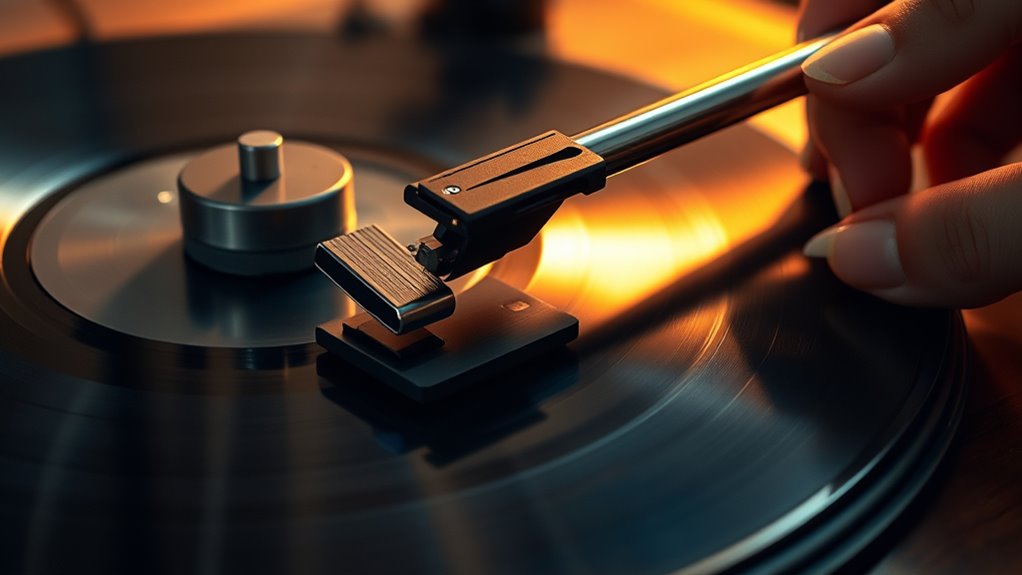
Adjusting the Tonearm for Proper Balance and Tracking Force
Before you play your records, it’s crucial to properly balance the tonearm and set the correct tracking force. Start by adjusting the counterweight calibration so the tonearm floats horizontally. Once balanced, use your tracking force gauge to set the ideal tracking force for your cartridge. This prevents record damage and assures peak sound quality. To help visualize, consider this table:
| Step | Action | Purpose |
|---|---|---|
| Balance the arm | Adjust counterweight | Achieve neutral floating |
| Set tracking force | Use gauge for calibration | Prevent skipping and wear |
| Verify stability | Play test record | Confirm proper setup |
Proper adjustment of the tracking force guarantees your vintage turntable performs at its best, delivering crisp, clean sound. Additionally, understanding the sound vibrations involved in turntable operation can help optimize your listening experience, as awareness of vibration control is essential for high-fidelity audio.
Connecting to Your Audio System
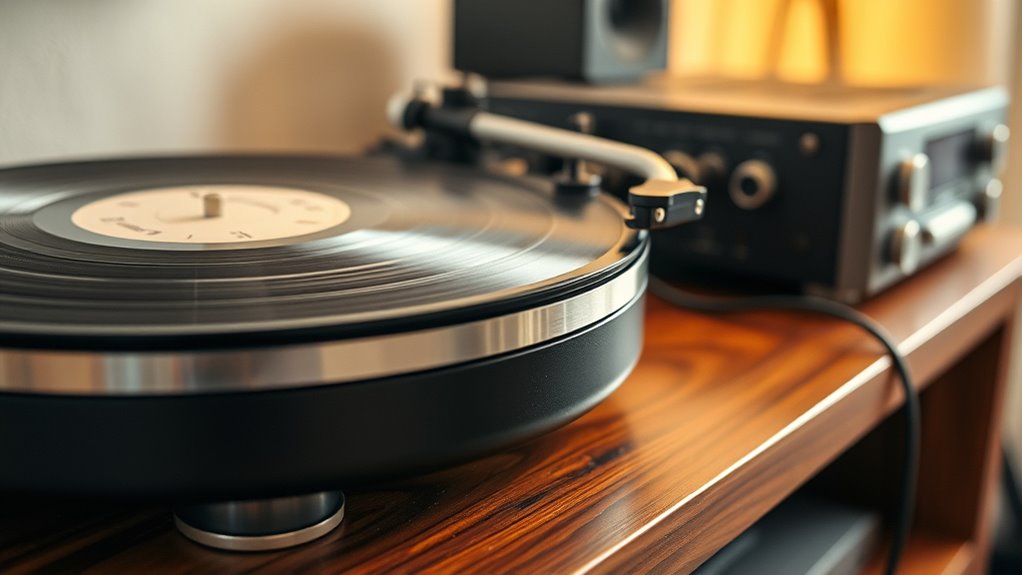
Connecting your vintage turntable to your audio system is a straightforward process that guarantees you get the best sound quality. First, ensure the cables you use are compatible with your turntable’s output and your receiver’s inputs. Check if your turntable has RCA, DIN, or other connectors, and select the right cables accordingly. Once connected, review your receiver settings to optimize input selection and volume levels. Proper cable compatibility prevents signal loss or noise, while correct receiver adjustments enhance sound clarity. Additionally, understanding the audio system compatibility ensures that your turntable functions optimally with your existing setup. Regularly assessing your setup can help maintain maximize space and organization and preserve sound quality over time. Incorporating professional-grade equipment can further improve overall audio performance. Being aware of grounding requirements can also reduce hum and improve audio fidelity. Moreover, paying attention to creative practice principles—such as attention to detail and experimentation—can help you fine-tune your setup for the best possible listening experience.
Calibrating the Speed for Accurate Playback

To guarantee your records sound their best, you need to calibrate your turntable’s speed. Start by checking if it spins at the correct rate and make adjustments using the pitch control if needed. Finally, verify the accuracy with a strobe to keep playback perfectly aligned. Incorporating precision calibration ensures that your turntable maintains consistent speed and sound quality over time. Paying attention to celebrity lifestyle insights such as how top performers optimize their equipment can provide additional tips for achieving flawless playback, especially by choosing unique and wicked planters that enhance your listening space’s aesthetic and acoustics. Additionally, investing in professional-grade accessories like high-quality styli and isolating platforms can further refine your listening experience. Regularly inspecting and maintaining your turntable’s drive belt or motor components is essential for sustained accuracy and performance.
Checking Turntable Speed
Ensuring your turntable spins at the correct speed is essential for accurate playback. To check this, use a stroboscopic record or a digital app that displays the speed. Place the platter mat properly and ensure your stylus replacement isn’t causing tracking issues. Here are key tips to help:
- Use a strobe disc to verify RPM accuracy
- Adjust the pitch control if available, but focus on the speed first
- Confirm the platter spins smoothly without wobbling
- Make sure the belt (if applicable) isn’t slipping or stretched
- Clean the stylus and check for dust or debris that may affect tracking
- Incorporate track development techniques to fine-tune your setup and achieve optimal sound quality
- Regularly monitor your setup, as vintage audio equipment can drift over time, affecting playback precision.
Regularly checking your turntable’s speed guarantees your records sound their best, preserving sound quality and preventing unnecessary wear. Proper calibration guarantees your vintage setup delivers perfect sound every time.
Adjusting Pitch Control
Adjusting the pitch control is a crucial step in fine-tuning your turntable’s speed for accurate playback. Proper calibration ensures your vinyl records sound true to the original recording techniques, preserving their quality. Use a strobe or app to check if the pitch is accurate; small adjustments can make a big difference. Be mindful that over-adjusting can affect vinyl record care, leading to unnecessary wear. Remember, maintaining consistent speed helps prevent pitch fluctuations that distort sound. Here’s a quick guide:
| Adjustment Step | Effect on Playback |
|---|---|
| Slight turn | Enhances recording precision |
| Moderate turn | Prevents speed fluctuations |
| Major turn | Risks damaging records and sound quality |
Verifying With a Strobe
Have you ever wondered how to accurately verify your turntable’s speed? Using a strobe disc is an effective way to guarantee proper turntable calibration. The key is to observe the strobe frequency, which reveals if your platter spins at the correct speed. When the turntable is running, under a strobe light, the pattern on the disc should appear stationary if it’s properly calibrated. If it appears to move, adjustments are needed. Proper calibration guarantees your vinyl sounds as intended, with accurate pitch and timing.
- Understanding strobe disc patterns
- Adjusting the speed controls
- Using the correct light source
- Recognizing signs of miscalibration
- Ensuring consistent playback quality
Cleaning and Maintaining Your Turntable Components
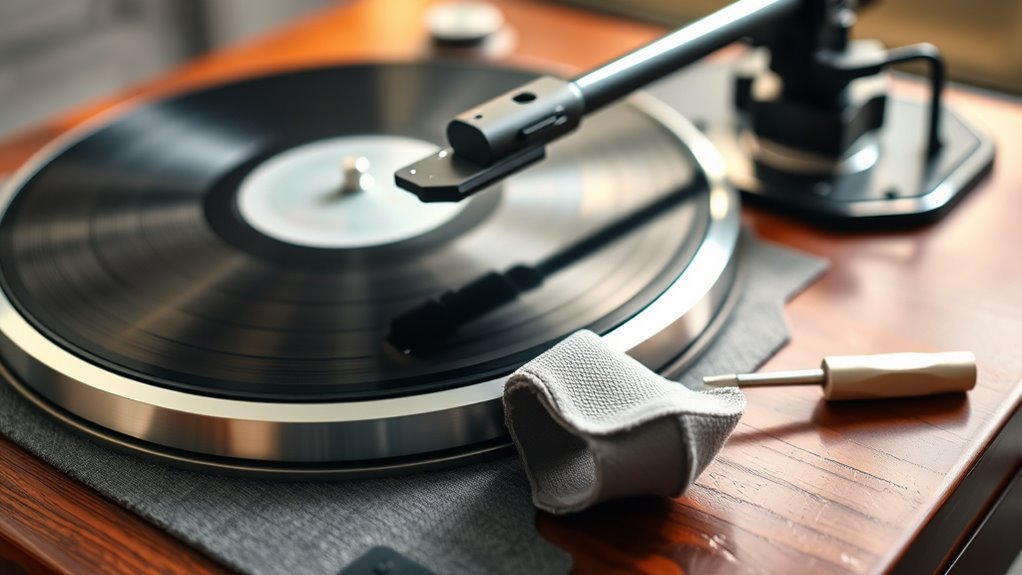
Regular cleaning and maintenance of your turntable components are essential to keep your setup performing at its best. Dust removal is crucial; use a soft brush or microfiber cloth to gently clean the platter, tonearm, and stylus, preventing debris from affecting sound quality. When cleaning the stylus, be careful and use a stylus brush or specialized cleaning solution to avoid damage. Lubricant application helps keep moving parts functioning smoothly—apply a small amount of turntable oil or grease to the spindle bearing and other pivot points. Avoid over-lubricating, as excess oil can attract dust and dirt. Regular upkeep ensures your turntable remains in prime condition, prolongs its lifespan, and preserves the sound quality you desire. Proper cleaning and maintenance are simple but essential steps in your setup process.
Testing and Fine-Tuning for Optimal Sound Quality
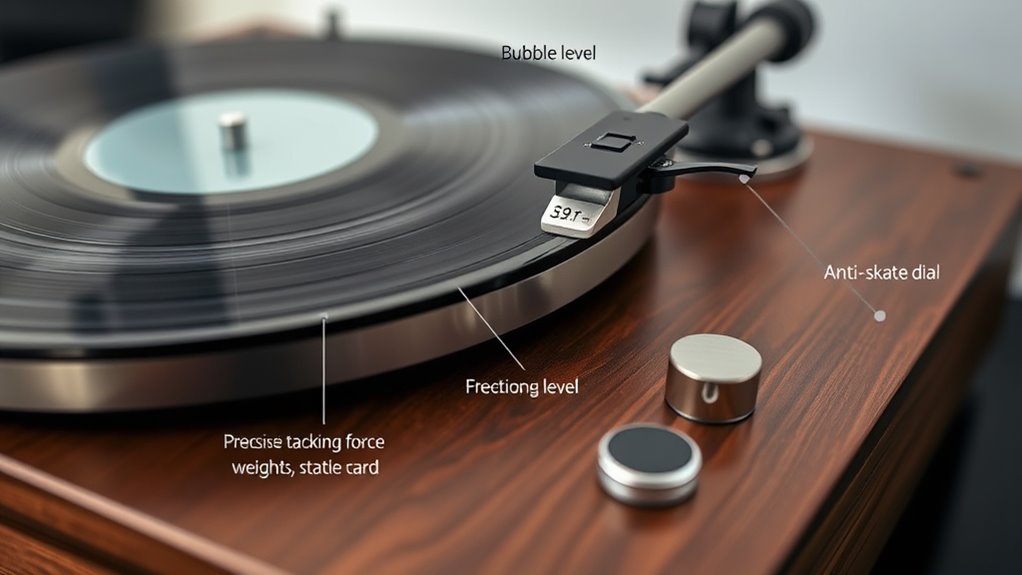
Once your turntable components are clean and well-maintained, it’s time to focus on testing and fine-tuning to achieve the best sound quality. You’ll want to carefully check the cartridge alignment, tracking force, and anti-skate settings to prevent unnecessary wear and distortion. Listening critically helps identify any issues caused by improper setup, which can be corrected with precise adjustments. Incorporate good vinyl storage tips to avoid warping that affects sound quality. Also, consider your recording techniques—using proper gain levels and balancing sound can enhance playback clarity. Regularly testing your setup ensures consistent performance, revealing if your stylus needs replacing or if your tonearm needs recalibration. Fine-tuning your vintage turntable guarantees excellent listening, preserving the rich sound that vinyl offers.
Frequently Asked Questions
How Often Should I Replace the Stylus for Optimal Sound?
You should replace the stylus every 500 to 1000 hours of playtime, as this is the typical stylus lifespan for most turntables. Regularly check for signs of wear, like skipping or distortion, and don’t wait too long to swap it out. A timely replacement guarantees you maintain peak sound quality and protect your records. Keep an eye on usage to determine the best replacement frequency for your setup.
What Type of Cleaning Products Are Safe for Vintage Turntables?
You should use safe cleaning products specifically designed for vintage turntables. Stick to gentle cleaning solutions like isopropyl alcohol diluted with distilled water or specialized electronics cleaners. Avoid harsh chemicals or abrasive materials that can damage delicate parts. Always apply cleaning products with a soft cloth or microfiber, and never spray directly onto the turntable. Regular, safe cleaning helps preserve your vintage turntable’s sound quality and prolongs its lifespan.
How Do Temperature and Humidity Affect Turntable Performance?
A stitch in time saves nine, and keeping your turntable in stable conditions proves true. Temperature fluctuations and high humidity can warp components, cause motor issues, or distort sound quality. For ideal performance, maintain consistent environmental stability by storing your vintage turntable in a cool, dry place. Proper storage conditions prevent damage, ensuring your turntable continues to deliver rich, clear sound for years to come.
Can I Use a Vintage Turntable With Modern Bluetooth Speakers?
You can definitely use a vintage turntable with modern Bluetooth speakers for seamless modern integration. Just make sure your turntable has a built-in Bluetooth transmitter or add an external one. This setup allows you to enjoy authentic vinyl sound wirelessly. Keep in mind, some vintage models may need a preamp to boost the signal. Once connected, you get the best of both worlds: classic sound quality and modern convenience.
What Are Common Signs of a Misaligned or Damaged Cartridge?
You’ll notice a misaligned or damaged cartridge when your music sounds off, with uneven sound or skipping. Ironically, your once-pristine cartridge now shows signs of stylus damage, like distortion or excessive skipping. Common signs include distorted sound, tracking issues, or uneven wear, all pointing to poor cartridge alignment. If you ignore these signs, you risk further stylus damage, which can permanently harm your turntable’s sound quality.
Conclusion
With your turntable perfectly set up, you’re ready to open a world of rich, warm sound like a vinyl revivalist. Just like a maestro fine-tunes an orchestra, your careful adjustments guarantee every record plays in harmony. Remember, patience and care turn simple setup into a timeless experience. Now, sit back, drop the needle, and let your music tell its story—because, in this moment, you’re the conductor of your own vintage symphony.