
TL;DR
Placing your computer or audio rig in a closet can cut noise and reflections dramatically. The key is treating reflection points, sealing gaps, and ensuring proper ventilation, not just stuffing foam everywhere. Proper placement and airflow make all the difference. You can learn more about acoustic dampening and placement techniques.
Ever tried to record or game only to be drowned out by your own rig’s noise? It’s frustrating. But here’s the game-changer: the best soundproofing isn’t about adding more foam. It’s about distance and smart placement. Moving your noisy machine into a closet or separate room can cut your noise problem in half—without expensive gear or complex setups.
This guide will show you how to turn a tiny closet into a quiet, effective space for voice-over, gaming, or music. You’ll learn the secrets of acoustic dampening, the importance of placement, and how to avoid the common pitfalls of tiny spaces.
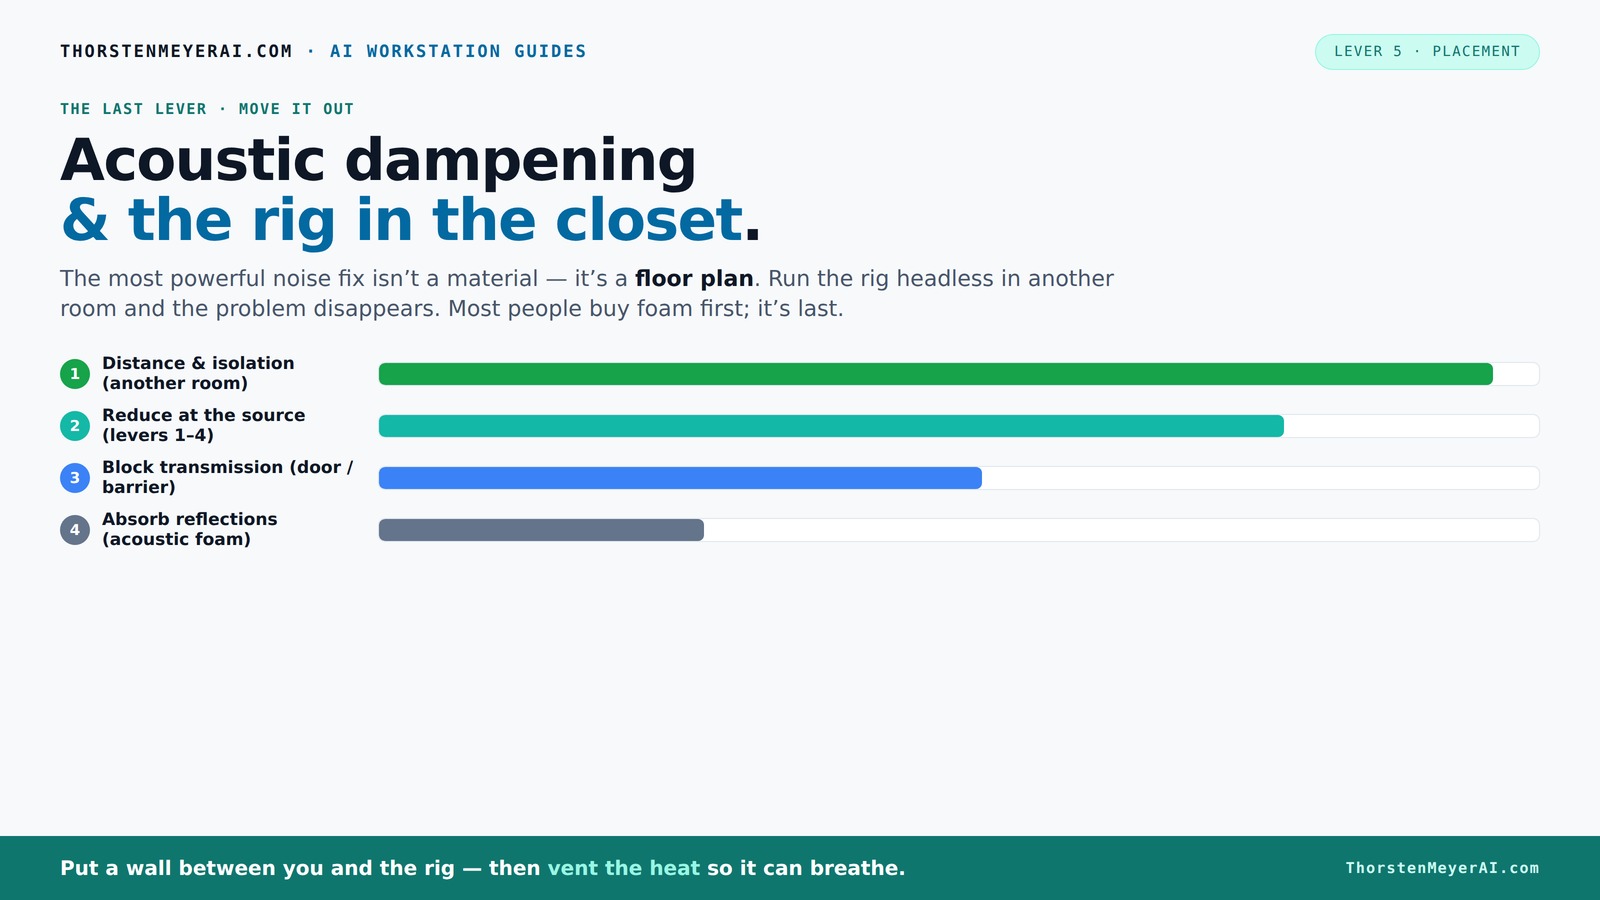
Acoustic dampening
& the rig in the closet.
The most powerful noise fix isn’t a material — it’s a floor plan. A rig you can’t hear because it’s in another room beats any amount of foam. Tap the approaches in Part 1 to see what actually works.
(another room)
(levers 1–4)
(door / barrier)
(acoustic foam)
Contain the noise, not the heat
Key Takeaways
- Moving your rig away from your workspace into another room or closet can cut noise dramatically more than foam treatments.
- Ventilation is critical — a sealed closet traps heat and can damage your hardware; add passive vents or a quiet exhaust fan.
- Use a combination of acoustic dampening (foam, blankets) and sealing gaps (weatherstripping, sealant) for real sound isolation.
- Place the microphone at reflection points and treat those surfaces with soft materials for clearer recordings.
- Corners and parallel walls cause low-end buildup — address these with bass traps or foam wedges to improve sound quality. Learn more about acoustic treatment for small spaces.

24 Pack Black 12 x 12 x 2 Inches Pyramid Designed Acoustic Foam Panels, Sound Proof Foam Panels for Walls, High Density and Flame-Retardant Acoustic Panels, Sound Panels for Recording and Home Studio
Exceptional Sound Absorption:These pyramid acoustic panels are engineered to effectively absorb sound waves, reducing echo and reverberation. With...
As an affiliate, we earn on qualifying purchases.
As an affiliate, we earn on qualifying purchases.
Why Moving Your Rig Is the Most Powerful Noise Fix
Your first move should be to put your rig as far away from your ears as possible. Distance is a noise killer. When your machine is in another room, the sound waves weaken, and reflections bounce less. Think of it like whispering from across the hall versus right next to your ear.
For example, a high-end AI workstation pumping out 600W of heat and noise in your desk corner could be virtually silent if placed in a basement or closet on the other side of the house. The noise just doesn’t reach you.
In voice recording, this is why many professionals keep their gear in a separate booth or room — it keeps sound reflections and outside noise out, and lets you focus on your voice, not the hum behind you.
Understanding the importance of spatial separation reveals a fundamental principle: reducing noise isn't just about absorption—it's about distance. Moving your rig away minimizes the sound energy reaching your ears, which is far more effective than trying to block or absorb noise at the source. This approach also reduces the need for complex treatments, making it an efficient first step. The tradeoff, of course, is that you lose direct access to the rig, so plan your setup accordingly.

RUIX OV303 ATX Mid-Tower PC Case, Pre-Installed 4 x 120mm Prism ARGB PWM Fans, USB 3.0 & Type-C Ports, High-Airflow Gaming Computer Case - Black
【Pre-Installed Fan】4 high-performance 120mm ARGB prism gaming fans have already been installed.
As an affiliate, we earn on qualifying purchases.
As an affiliate, we earn on qualifying purchases.
The 'Rig in the Closet' Setup — How It Works and Its Biggest Caveat
Putting a hot, noisy machine inside a closet sounds perfect — until it isn’t. The key is ventilation. Without airflow, heat builds up fast. A 600W GPU in a sealed closet can turn that space into an oven, causing the rig to throttle and fans to scream.
To make a closet work, add passive vents or a quiet exhaust fan. Commercial soundproof cabinets solve this by combining acoustic foam lining with temperature-controlled airflow — they keep noise down while preventing overheating.
For example, a DIY creator might add a small fan, weatherstripping the door, and line the inside with foam. It’s cheap and effective — but you must keep the space cool, or the heat will undo all your quiet efforts. Consider the tradeoff: increased airflow can introduce noise if not carefully managed, so choose your ventilation solutions wisely. Properly designed, passive ventilation or low-noise fans prevent heat buildup without compromising noise reduction. The challenge is balancing cooling with sound isolation; over-sealing can trap heat, reducing hardware lifespan and performance, so always monitor temperatures.
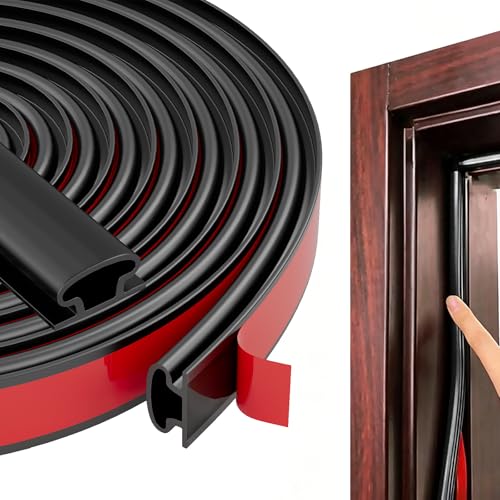
Black Rubber Weather Stripping Door Seal Strip, D Shape Door Weather Seal Strip, Self-Adhesive Soundproofing Frame Insulation Tape for Doors Frame/Window Seal,Blocks Cold Drafts Noise
【THICKENED SILICONE MATERIAL - COMPLETELY BARRIERING AIR AND NOISE】:The weather stripping is made of thickened TPE material with...
As an affiliate, we earn on qualifying purchases.
As an affiliate, we earn on qualifying purchases.
Acoustic Dampening vs. Soundproofing — What Really Stops Noise
Acoustic dampening and soundproofing are different tricks for different problems. Dampening — using foam or blankets — reduces echo and reflections inside a space. Soundproofing — sealing gaps and adding dense barriers — blocks noise leakage.
In a closet, dampening softens the sound bouncing around. Soundproofing prevents noise from escaping through cracks or thin surfaces. For example, sealing the door frame with weatherstripping cuts down on sound leaks just as much as installing foam panels.
Understanding why both are necessary is key. Dampening alone might make a room sound less echoey but won’t stop noise from escaping or entering. Conversely, sealing gaps without dampening can make a space sound unnatural or overly dead. Combining both approaches ensures that internal reflections are controlled while external noise leaks are minimized. The tradeoff is that over-sealing can make the space feel cramped or unnatural, so aim for a balanced setup suited to your specific needs.
Experts agree: foam absorbs sound but doesn’t block it. To truly contain or isolate noise, you need solid barriers, sealing, and sometimes mass-loaded vinyl or other dense materials. The best results come from integrating both dampening and soundproofing techniques based on your priorities—whether recording clarity or noise reduction.

Easy Cloud Computer Fan with AC Plug, 120mm Variable Speed Axial Muffin PC Fan with Controller 120V 110V 220V Small 12V Case Cooling for PC Server Cabinet DVR TV Router Receiver Xbox Greenhouse
【Speed Controllable】Easy Cloud axial fan 120v allows you to freely adjust the computer cooling fan speed according to...
As an affiliate, we earn on qualifying purchases.
As an affiliate, we earn on qualifying purchases.
Placement Strategies: Where to Put Your Microphone and Acoustic Treatment
Placement is everything—especially with a small closet. Your microphone should point away from reflective surfaces and be positioned at mouth level for best clarity. The first step is to identify reflection points around your voice path.
Next, treat the surfaces that bounce sound back at the mic: the wall behind it, side walls, and ceiling. Use thick foam, blankets, or hanging curtains. Focus especially on the door — sealing gaps and adding a soft barrier helps keep sound from escaping.
Understanding how sound reflections work helps you make smarter choices. For detailed tips, check out this guide on acoustic placement. Positioning the mic at the right distance and angle reduces the pickup of unwanted echoes. Treating reflection points—like the wall behind the mic and nearby surfaces—breaks up the sound waves bouncing around, preventing comb filtering and muddiness. This is crucial in tight spaces where reflections are omnipresent. The tradeoff involves balancing absorption with natural sound; too much treatment can make recordings sound dull or unnatural. Experiment with placement and materials to find the sweet spot for your voice and space.
Corners and Parallel Walls: The Hidden Trouble Spots
Small closets are often boxy, with parallel walls. This creates standing waves and low-end buildup. The result? Muddy, boomy sound that’s hard to fix without proper treatment.
To combat this, add bass traps or foam wedges in the corners. Even simple DIY panels can break up these problematic reflections. In a tiny closet, over-treatment can deaden your sound, so balance is key.
Imagine standing in a small box and shouting — the sound echoes back and forth, bouncing off parallel surfaces. Proper treatment diffuses or absorbs these reflections, making your recordings clearer. The tradeoff is that over-treating can remove desirable warmth and naturalness, so focus on critical areas like corners and first reflection points. Using a combination of bass traps and broadband panels can help achieve a balanced, full sound without overdoing it.
Sealing Gaps and Treating the Door for Better Isolation
The door is the weak link in most closet booths. Sound leaks through the cracks and gaps. Sealing with weatherstripping, acoustic sealant, or adding a blanket or curtain over the door can drastically reduce noise escape.
Imagine your door as a sieve — sealing it turns it into a solid barrier. For example, a common trick is to wrap a thick blanket around the door frame or hang a moving blanket for quick, effective soundproofing. Consider how gaps at the bottom and sides can act like leaks—adding door sweeps or draft stoppers can help close these off. The tradeoff involves managing airflow; sealing too tightly without ventilation can trap heat and reduce hardware longevity. The goal is to create a barrier that minimizes noise escape while maintaining enough ventilation for your equipment’s safety.
Remember, the goal isn’t total silence but a significant reduction of leakage, especially for voice-over or podcasting in shared spaces.
Budget-Friendly Tips for a Better Closet Sound Booth
Don’t underestimate simple, low-cost solutions. Thick blankets, rugs, and even DIY foam panels can make a big difference. Hang blankets on walls, drape a curtain rod with fabric, or stack moving blankets around the rig.
For example, a YouTuber used cheap foam from Amazon and layered blankets over a closet door. The result? Significantly less echo and noise leakage, with minimal expense. The key is understanding that soft, porous materials absorb and diffuse sound waves, preventing reflections and reducing noise transmission. Strategically placing these materials at reflection points and gaps maximizes their effectiveness without complex installations. While budget options are effective, they require careful placement and some experimentation to achieve the best balance between sound absorption and natural tone.
Key takeaway: focus on soft, absorbent materials placed at reflection points and gaps for quick wins.
Can a Closet Be Good Enough for Singing, Voice, and Gaming?
Yes. A well-treated closet can handle voice recordings, podcasts, streaming, and even gaming. The key is balancing dampening with ventilation. For singing or voice-over, focus on reflection control and sealing gaps. For gaming or streaming, noise reduction and clarity matter more.
For example, a podcaster turned their closet into a mini studio by adding foam panels, sealing gaps, and ensuring good airflow. The result? Clear, professional-sounding recordings without breaking the bank.
In essence, small spaces work as long as you treat reflections and manage heat. It’s about smart placement and soft materials. The tradeoff is that over-treatment can make the space sound unnatural or too dead, so aim for a balanced approach that preserves some natural resonance while minimizing problematic reflections and noise leaks.
Addressing multi-purpose uses requires understanding that different activities have different acoustic needs. Voice work benefits from reflection control, while gaming and streaming prioritize noise isolation. Combining treatments smartly allows your closet to serve multiple functions effectively, but always keep ventilation in mind to prevent overheating and equipment damage.
Frequently Asked Questions
How much acoustic treatment do I need in a small closet?
Start with treating reflection points around the mic: the wall behind, sides, and ceiling. Use thick foam or blankets, especially at the mic’s reflection points. Don’t overdo it—too much deadening can dull your sound. Focus on sealing gaps and treating the door first for best results.Where should I place my microphone for the clearest sound?
Position the mic a few inches away from reflective surfaces, ideally at mouth level. Aim it away from the door and treat the wall behind it to reduce echoes. Small adjustments can make a big difference in clarity and presence.Should I treat the corners or the walls first?
Corners are prime spots for bass buildup, so adding bass traps or foam wedges there helps control low-end muddiness. Then focus on treating reflection points on walls and ceiling. Balance is key—too much deadening can reduce natural warmth.Does acoustic foam really soundproof a closet?
No, acoustic foam mainly reduces echoes and reflections. It doesn’t block outside noise. To soundproof, you need sealing, barriers, and gaps closed. Foam makes your recordings cleaner but isn’t a noise barrier.Can I use blankets instead of foam panels?
Absolutely. Thick blankets or moving quilts are effective and budget-friendly. Hang them on walls, drape over doors, or stack around your rig. Soft, absorbent materials are your best allies for reducing reflections and leakage.Conclusion
Moving your noisy rig into a closet isn’t just about hiding the sound — it’s about smartly controlling reflections, leaks, and heat. When combined with proper placement and ventilation, a closet rig can be a game-changer for quiet, professional recordings or gaming sessions.
The real magic lies in understanding that distance, soft materials, and sealing gaps beat foam alone every time. Think of your closet as a blank slate — treat it right, and it becomes your secret weapon for a quiet, clear workspace.