To restore a mid-century modern dresser or cabinet, start by carefully cleaning and evaluating the original hardware, then restore or replace it to preserve authenticity. Remove old finishes with gentle stripping or sanding, focusing on highlighting the natural wood grain. Apply a suitable stain or clear finish in thin layers for a smooth look, and reassemble your piece with care. For a professional touch, you’ll discover detailed steps and tips as you continue.
Key Takeaways
- Carefully clean and examine hardware, replacing tarnished pieces with vintage or updated alternatives for authenticity.
- Remove old finishes with gentle stripping or sanding, preserving the natural wood grain like teak or walnut.
- Apply stain or clear polyurethane in thin, even coats to enhance wood tone and protect the surface.
- Handle each step with patience, ensuring smooth sanding, proper finish application, and careful reassembly.
- Highlight the piece’s mid-century charm by restoring sleek lines and adding subtle modern hardware updates.
Restoring a mid-century modern dresser or cabinet can breathe new life into a piece that’s rich with history and style. These pieces often feature distinctive vintage hardware that adds character and authenticity, so preserving or carefully replacing these details is essential. When you’re starting your restoration, take a close look at the original hardware—handles, pulls, or knobs—and assess their condition. If they’re intact and still functional, consider cleaning them thoroughly to bring out their original shine. For hardware that’s tarnished or rusted, gentle cleaning with a metal polish or a vinegar solution can often restore their luster, but if they’re beyond saving, sourcing vintage replacements will keep the piece true to its era.
Preserve vintage hardware or replace it to maintain your piece’s authentic mid-century charm.
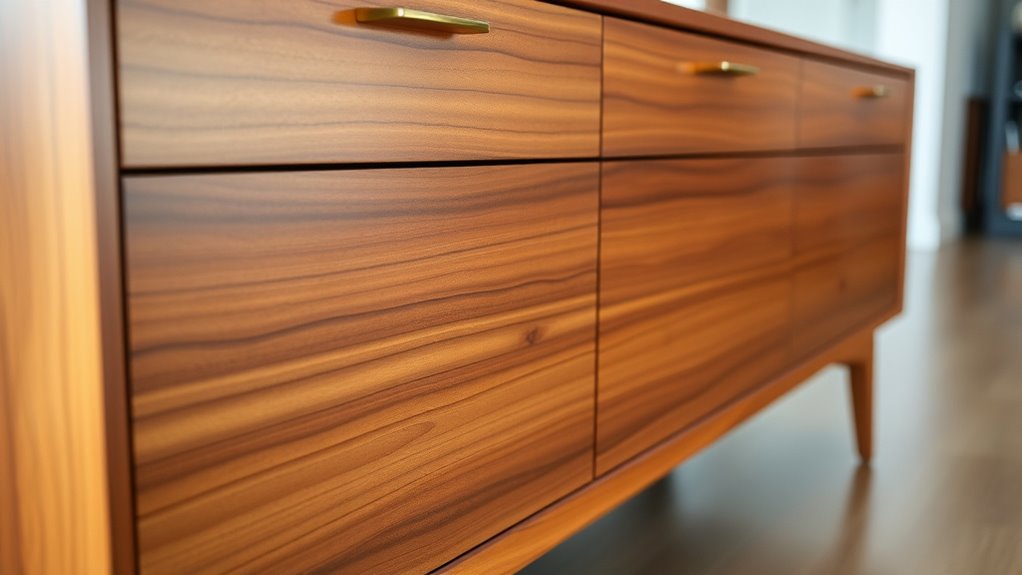
Wood refinishing is a critical step in revitalizing your furniture. Begin by removing any existing finish that’s worn or damaged, using a chemical stripper or sanding carefully to avoid damaging the wood’s surface. Mid-century modern furniture often features beautiful wood grains—teak, walnut, or rosewood—that shine through after proper refinishing. After stripping, sand the surface smoothly, progressing from coarse to fine grit, to eliminate scratches and create an even base for staining or sealing. When choosing a finish, opt for a stain that enhances the natural wood tone, or go for a clear polyurethane to preserve the original look while adding durability.
Applying the finish with a brush or cloth, follow the manufacturer’s instructions for drying times and coats. Multiple thin coats tend to yield the best results, preventing drips and uneven spots. Once the finish has dried completely, you can polish the surface with a soft cloth to bring out its natural luster. Restoring vintage hardware and properly refinishing the wood transforms your piece from worn-out to stunning, highlighting the sleek lines and timeless appeal of mid-century modern design. Additionally, understanding the energy-efficient finishes and eco-friendly restoration methods can help you create a sustainable and environmentally conscious project.
Throughout the process, handle each step with care and patience. Take your time to thoroughly clean, strip, sand, and finish, because rushing can cause imperfections or damage. When reassembling, pay attention to the hardware placement—sometimes repositioning or updating hardware slightly can give the piece a fresh, modern feel while still respecting its vintage charm. Restoring a mid-century modern dresser or cabinet isn’t just about repair; it’s about honoring the craftsmanship and style of the era, ensuring your restored piece will be a treasured focal point in your space for years to come.

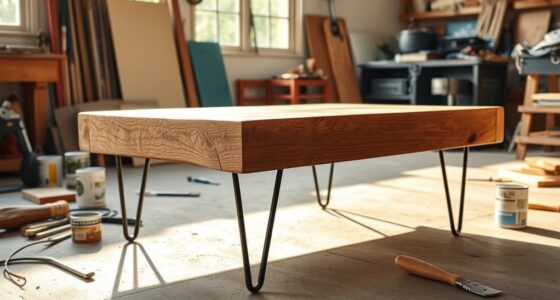
Wood Sofa Legs 8 Inch Set of 4 Cabinet Chair Mid Century Modern Replacement Furniture Feet Set of 4 Screw in Predrilled M8 Bolt
Height: 8 inch/20cm; top diameter: 2.3 inch/ 5.8cm; bottom diameter: 1.6inch/ 4cm *4/6/8-INCH HEIGHT OPTIONS – PLEASE MEASURE…
As an affiliate, we earn on qualifying purchases.
As an affiliate, we earn on qualifying purchases.
Frequently Asked Questions
What Are the Best Tools for Restoring Vintage Furniture?
You’ll want a good set of sanding tools, like an orbital sander and fine-grit sandpaper, to master sanding techniques and remove old finishes smoothly. A putty knife helps with filling cracks, while finishing waxes protect and enhance the wood’s beauty. Don’t forget quality brushes or cloths for applying waxes evenly. These tools make restoring vintage furniture easier and guarantee a professional-looking finish that preserves its mid-century charm.
How Can I Identify the Original Finish of My Piece?
Like dialing into a vintage radio, identifying your piece’s original finish involves examining its grain pattern and finish sheen. Look closely at the wood; a glossy or matte sheen hints at the past. Feel the surface—smooth or slightly textured. Check for signs of aging, like crackling or discoloration. Research mid-century finishes, and compare your findings to photos online. This detective work reveals whether it’s lacquer, shellac, or varnish hiding underneath, guiding your restoration.
Is It Necessary to Remove Old Paint or Stain Before Restoration?
Yes, it’s necessary to do paint removal or stain stripping before restoration. You should carefully remove old paint or stain to reveal the original finish or bare wood, which helps you assess the piece’s true condition. Use appropriate tools like chemical strippers or sanding techniques. This step guarantees a smooth surface for new finishes, prevents adhesion issues, and preserves the authentic mid-century modern look.
What Are Eco-Friendly Options for Furniture Refinishing?
Think of your furniture as a blank canvas like Monet’s water lilies, waiting for eco-friendly touches. You can choose natural finishes like beeswax or plant-based oils, which are healthier and sustainable. Recycled materials, such as reclaimed wood or recycled metal hardware, add character and reduce waste. These options not only preserve the environment but also give your piece a unique, timeless charm, blending beauty with conscience effortlessly.
How Long Does a Typical Restoration Process Usually Take?
A typical restoration process usually takes around one to three weeks, depending on the project’s scope and your project’s planning. You’ll want to allocate time for assessment, cleaning, repairs, and finishing touches. Proper project planning helps you stay on track and avoid delays. Keep in mind that eco-friendly options may require extra drying or curing time, so factor those into your overall restoration timeline for a smooth, successful project.

GREENEZ Strip & Clean Furniture Stripping Kit | Removes Multiple Paint Layers | Varnish & Epoxy Remover | Wood Paint Stripper | Melts Coatings | Soy-Based Formula | Includes Residue Removal Spray
Effortless & Safe Paint Removal: GREENEZ Strip & Clean melts away multiple layers of stubborn paint, varnish, and…
As an affiliate, we earn on qualifying purchases.
As an affiliate, we earn on qualifying purchases.
Conclusion
Restoring your mid-century modern dresser or cabinet brings new life to a piece you love. Don’t let fears of imperfection hold you back—perfection isn’t the goal; character and charm are. Embrace the process, learn as you go, and enjoy the satisfaction of transforming your furniture. With patience and care, you’ll create a beautiful, timeless piece that reflects your effort and style, proving that even a simple restoration can be deeply rewarding.

Bluebird Polyurethane Clear Coat for Furniture, Paintings, Water-Based Professional Varnish (Gloss, 3.4 Fl Oz)
Bluebird’s high-performance Top Coat acts as a protective barrier, safeguarding Furniture, Chalk Paint, Acrylics, and Oil paintings from…
As an affiliate, we earn on qualifying purchases.
As an affiliate, we earn on qualifying purchases.
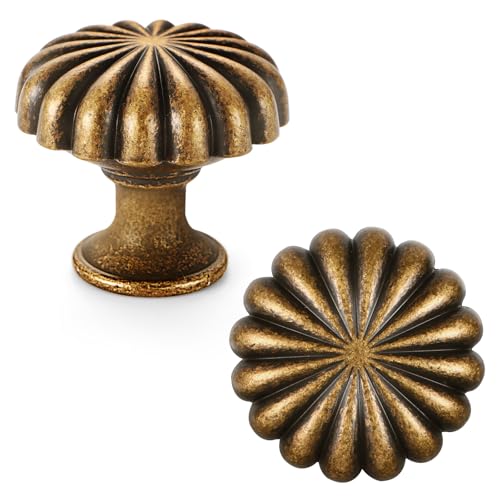
FAPUAL 10 Pack Antique Brass Cabinet Knobs for Kitchen Cabinets and Dresser Drawers,Zinc Alloy Hardware Handles Pulls,Vintage Cupboard Drawer Knob
【Elegant Design】:These antique brass cabinet knobs is made of zinc alloy solid, our cabinet knobs offer reliable strength…
As an affiliate, we earn on qualifying purchases.
As an affiliate, we earn on qualifying purchases.