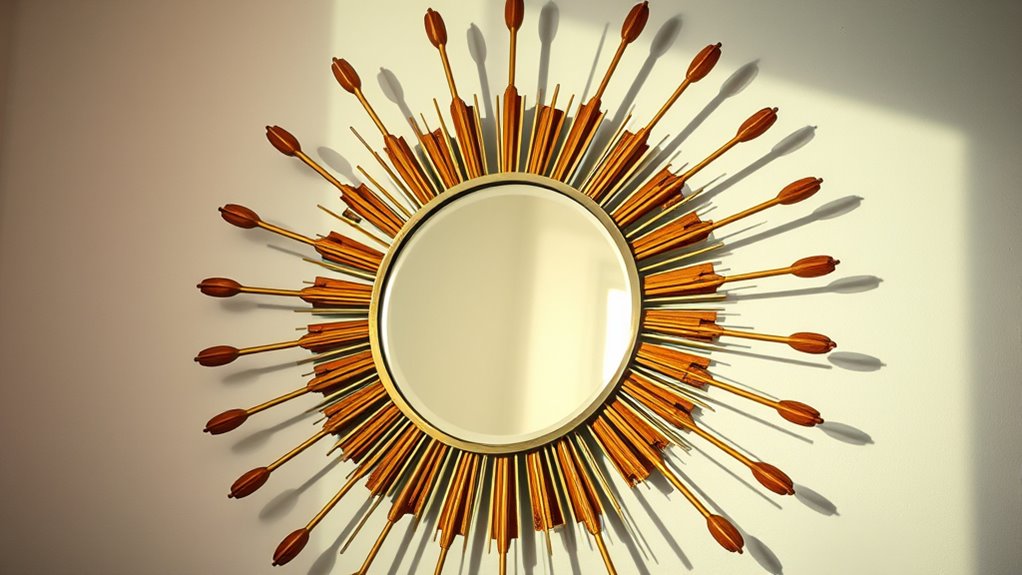
Create a stunning mid-century starburst mirror by choosing bold or muted colors and mixing materials like wood, metal, or painted skewers. Start with a round mirror and cut your rays to different lengths and angles for a dynamic look. Attach the rays evenly around the mirror using strong adhesive or small nails, ensuring they’re balanced. To make it truly eye-catching, play with contrasts and metallic accents. Keep exploring for more tips on perfecting your retro wall art!
Key Takeaways
- Select a bold or muted color palette that complements your decor and enhances the retro vibe.
- Use materials like wooden dowels, metal rods, or painted skewers to create radiating rays for the starburst effect.
- Attach the rays evenly around a sturdy round mirror, varying lengths and angles for visual interest.
- Incorporate metallic accents and contrasting colors to achieve an authentic mid-century style.
- Hang the finished piece at eye level above furniture for maximum impact and balanced decor integration.
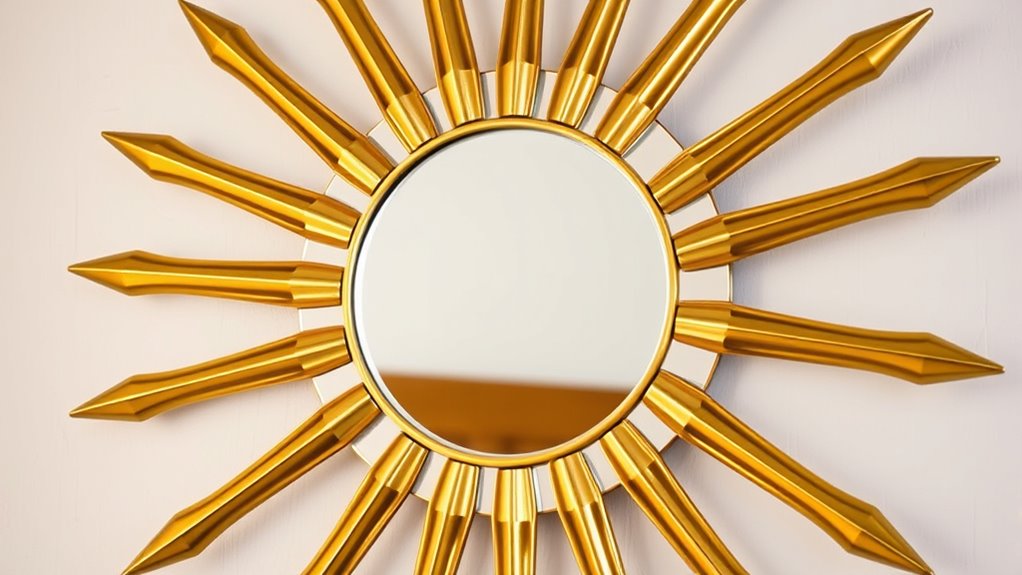
Creating your own wall art is a budget-friendly way to personalize any space and showcase your creativity. When crafting a retro-inspired starburst mirror, the first step is to think about your color palette. Think bold and vibrant or sleek and muted, depending on the mood you want to create. Retro designs often feature striking contrasts, so don’t shy away from combining metallics with bright hues or opting for a monochrome scheme with pops of color. Your choice of colors should complement your existing decor while giving the piece a distinct mid-century vibe. Equally important are your material choices. For the starburst rays, you can use a variety of materials like wooden dowels, metal rods, or even painted skewers—whatever fits your style and budget. Wood offers warmth and a natural feel, while metals lend a sleek, modern edge. If you’re feeling adventurous, mix materials for added texture and visual interest. Exploring different material options can help tailor the piece to your personal style and the overall aesthetic of your space.
Once you’ve nailed down your color palette and material choices, gather your supplies. Select a sturdy round mirror as the centerpiece, and prepare your rays accordingly. Cut your chosen materials into lengths that radiate outward from the mirror, creating an even and balanced starburst effect. Paint or stain your rays beforehand to match your color scheme, ensuring they dry completely before assembly. If you opt for painted wood or metal, use spray paint for a smooth finish and consistent coverage. When assembling, attach the rays to the back of the mirror with strong adhesive or small nails, spacing them evenly for symmetry. Keep a ruler or measuring tape handy to guarantee your rays are aligned properly, creating a harmonious and professional look.
The key to a successful retro starburst mirror is balancing boldness with simplicity. You want your piece to make a statement but not overwhelm the space. Play with different lengths and angles for the rays to add dynamism, and don’t be afraid to incorporate metallic accents for an authentic mid-century touch. Once assembled, hang your artwork at eye level for maximum impact. Position it above a sofa, console table, or bedroom dresser to instantly elevate your decor. As you craft your starburst mirror, remember that your choices in color palette and materials are what give it character and charm. With a little effort and creativity, you’ll create a stunning piece that reflects your style and adds a retro flair to your home.

Scotch Felt Pads 162 PCS Beige, Felt Furniture Pads for Protecting Hardwood Floors, Round, Assorted Sizes Value Pack, Self-Stick design, Protecting from nicks, dents and scratches (SP845-NA)
GREAT FOR FURNITURE AND DÉCOR: Scotch felt pads for furniture on hardwood floors are great for chair legs,...
As an affiliate, we earn on qualifying purchases.
Frequently Asked Questions
What Materials Are Best for a Durable Starburst Mirror?
To guarantee mirror safety and frame durability, opt for sturdy materials like thick metal or high-quality wood for the frame. Use tempered glass for the mirror itself, as it’s safer and more durable. Incorporate strong adhesives or screws to hold the starburst rays securely in place. These materials will help your DIY project stay safe, last long, and maintain its stylish mid-century look.
How Can I Customize the Size of My Wall Art?
You can customize your wall art’s size by playing with scale adjustments and proportion considerations. Start by choosing a central mirror size that fits your space, then extend the rays or accents proportionally to create a balanced look. Think of your design as a sun radiating warmth—adjust the scale to match your room’s dimensions, ensuring your starburst mirror becomes a harmonious focal point that’s uniquely yours.
Are There Eco-Friendly Options for DIY Mirror Frames?
Yes, you can choose eco-friendly options for your DIY mirror frames. Look for recycled materials like reclaimed wood, metal, or plastic to reduce waste. You might also opt for biodegradable options such as bamboo or cork, which are sustainable and eco-conscious. Using these materials not only creates a stylish, retro-inspired look but also helps you minimize your environmental impact while crafting a beautiful, unique mirror frame.
What Safety Precautions Should I Take When Assembling?
When assembling your starburst mirror, prioritize workspace safety by wearing personal protective equipment like safety glasses and gloves to prevent injuries. Make sure your workspace is well-ventilated and free of clutter to avoid accidents. Handle sharp tools carefully, and work on a stable surface. Double-check that all glue or adhesive is fully cured before hanging. Staying attentive and cautious guarantees a safe and enjoyable DIY experience.
How Long Does It Typically Take to Complete This Project?
Imagine your creative journey as a glowing starburst stretching across the night sky. The project timeline depends on your skill level; if you’re experienced, it might take 2-4 hours. Beginners may need 5-6 hours to complete it, allowing time for precise measurements and adjustments. Patience turns your vision into reality, and with steady hands, you’ll craft a stunning, mid-century style mirror that shines as brightly as your effort.
Amazon Product B0FMX7MF75
As an affiliate, we earn on qualifying purchases.
Conclusion
Now that you’ve crafted your own mid-century starburst mirror, you’ve created a stunning statement piece for your space. Did you know that mid-century modern design remains the most popular interior style, with 67% of homeowners favoring its sleek, timeless look? Your DIY project not only adds personality but also taps into this enduring trend. Keep experimenting with designs—your personalized wall art will continue to impress and inspire everyone who visits!
Felt Furniture Pads X-PROTECTOR 133 PCS Premium Furniture Pads - Felt Pads Furniture Feet Best Wood Floor Protectors - Protect Your Hardwood & Laminate Flooring! Brown and Beige
✌ X-PROTECTOR FURNITURE FELT PADS – best protection for Your wooden, laminate or tiled floors. Our furniture coasters...
As an affiliate, we earn on qualifying purchases.

300 Pack Thin Felt Pads 3/8" 1cm Diameter Mini Foam Felt Pads Self Stick Pad Circle Cabinet Door Bumpers Cushion Dots Furniture Bumpers Mats Dots for Tables Drawers Desks Floor
Ample Quantity: Includes 300 self-adhesive round felt pads, each approximately 0.4 inches (1 cm) in diameter and 0.11...
As an affiliate, we earn on qualifying purchases.