To maintain and restore your vintage audio equipment, start by carefully inspecting for wear, corrosion, and damaged parts. Clean external surfaces with gentle cleaners and dust, then test internal components like capacitors and tubes, replacing those that are faulty. calibrate bias and adjust the power supply for reliable operation. Regularly monitor sound quality and make precise adjustments to keep authentic tone. Keep detailed records, and if you continue, you’ll discover expert tips to restore your gear to prime condition.
Key Takeaways
- Conduct thorough inspections of external and internal components, addressing corrosion, damage, and wear to assess repair needs.
- Replace faulty capacitors and tubes with high-quality, authentic parts, testing each for proper function before installation.
- Regularly clean and dust surfaces, and use appropriate cleaners to maintain the equipment’s vintage appearance and prevent buildup.
- Test and adjust bias and calibration settings to optimize sound quality and ensure equipment operates reliably.
- Store equipment in a controlled environment, protect against power surges, and keep detailed records of maintenance and repairs.

Stratocaster Split Shaft Potentiometer and Capacitor Kit, 3-Pack
Contains three vintage-accurate 250K 3/8" CTS split shaft audio taper potentiometers for volume and tone controls on an…
As an affiliate, we earn on qualifying purchases.
As an affiliate, we earn on qualifying purchases.
Assessing the Condition of Your Vintage Audio Gear
Before restoring or using your vintage audio gear, it’s essential to evaluate its current condition. Start by inspecting its vintage aesthetics—note any scratches, discoloration, or worn areas that affect its visual appeal. These details influence the equipment’s overall charm and can impact its collectors’ value. Check for signs of corrosion, damaged knobs, or broken switches, as these issues might require repairs or replacements. Listen for any irregular sounds or hums during operation, which could indicate internal problems. Examine the tubes, belts, and internal components if accessible. Being thorough now helps you determine what repairs are needed, preserves the equipment’s authentic look, and maintains its worth in the collectors’ market. Proper assessment is key to ensuring it functions well and retains its nostalgic appeal. Additionally, understanding the importance of vintage aesthetics can help prioritize restoration efforts that enhance both performance and visual charm. Recognizing the impact of internal components on sound quality is also crucial for a successful restoration.

How to Service Your Own Tube Amp: A Complete Guide for the Curious Musician
This illustrated workbook explains basic amplifier electronics, servicing skills, maintenance tips, troubleshooting and simple modifications
As an affiliate, we earn on qualifying purchases.
As an affiliate, we earn on qualifying purchases.
Cleaning and Maintaining External Surfaces

To keep your vintage audio equipment looking its best, regular cleaning of the external surfaces is essential. Dust removal prevents buildup that can affect performance and preserves the equipment’s appearance. Use a soft, microfiber cloth to gently wipe down the surfaces, avoiding abrasive materials that could cause scratches. Surface polishing with a suitable cleaner can restore shine and remove fingerprints or smudges, enhancing its visual appeal. Incorporating smart home technology can also help monitor and maintain optimal conditions for your gear. Regularly inspecting and cleaning external filters helps extend the lifespan of your equipment’s components. Use gentle, non-abrasive cleaners to protect finishes. Regularly dust hard-to-reach areas to prevent dust accumulation. Avoid excessive moisture that could damage internal components. Polishing surfaces to restore luster and keep the equipment looking new is a key step in preventive maintenance. Additionally, understanding proper cleaning techniques ensures you do not inadvertently damage delicate parts. Staying informed about AI security measures can help protect your equipment from digital threats and unauthorized access. Consistent care guarantees your vintage gear remains both functional and visually appealing.

Boundless Audio Vinyl Record Cleaning Kit – 5-in-1 Vinyl Cleaning Kit Includes Velvet Record Brush, Stylus Cleaner, Cleaner Solution, Nylon Brush & Storage Bag
Clean and protect your vinyl collection — Our vinyl record cleaning kit is the simple and safe way…
As an affiliate, we earn on qualifying purchases.
As an affiliate, we earn on qualifying purchases.
Checking and Replacing Capacitors and Other Components
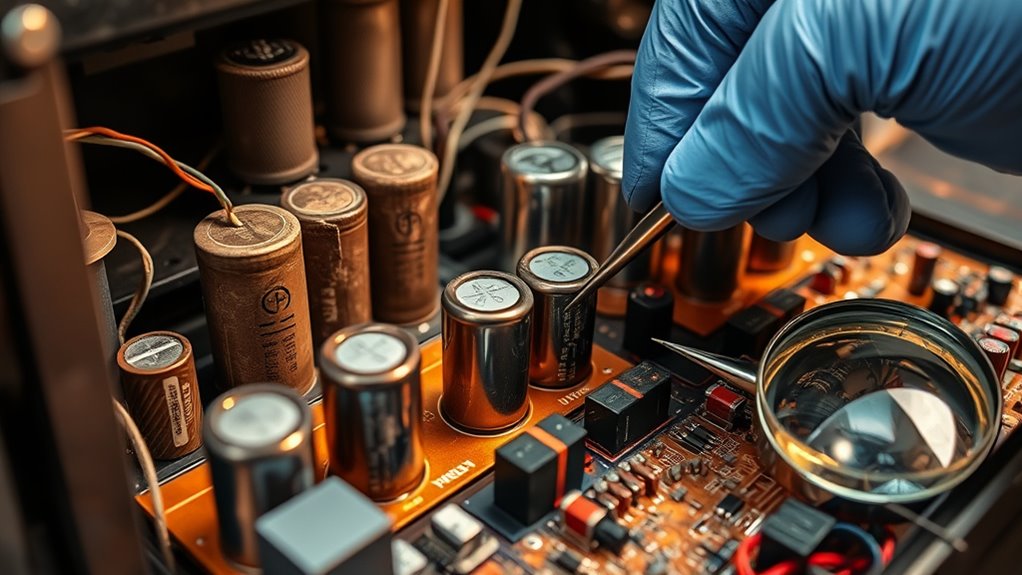
Checking and replacing capacitors and other components is vital to guarantee your vintage audio equipment continues to function properly. Capacitor types vary, including electrolytic, film, and paper capacitors, each serving different roles and requiring specific replacements. When inspecting components, look for signs of leakage, bulging, or corrosion, which indicate failure. Proper component sourcing is essential; you want high-quality replacements that match the original specifications to maintain sound quality and reliability. Use a multimeter to test capacitors and resistors, ensuring they operate within their tolerances. Keep detailed notes of your findings and replacements. This careful approach prevents future issues and prolongs your equipment’s lifespan, ensuring it continues to deliver authentic vintage sound. Additionally, understanding the different types of capacitors can help you select the most suitable replacements for optimal performance, especially considering the electrolytic, film, and paper capacitor distinctions.

LUNARM Bias Tape Tool Kit with Instruction, 5 Sizes Bias Tape Maker (6mm 9mm 12mm 18mm 25mm) with 4 Pcs Sewing Machine Presser Foot, Sewing Clips, Ball Point Pins, Awl, for Fabric Sewing and Quilting
Sewing Tool Kit: You will get 5 bias tape makers, instruction, 4 pcs sewing clips, 10 pcs ball…
As an affiliate, we earn on qualifying purchases.
As an affiliate, we earn on qualifying purchases.
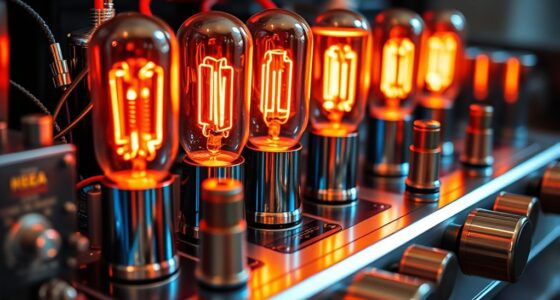
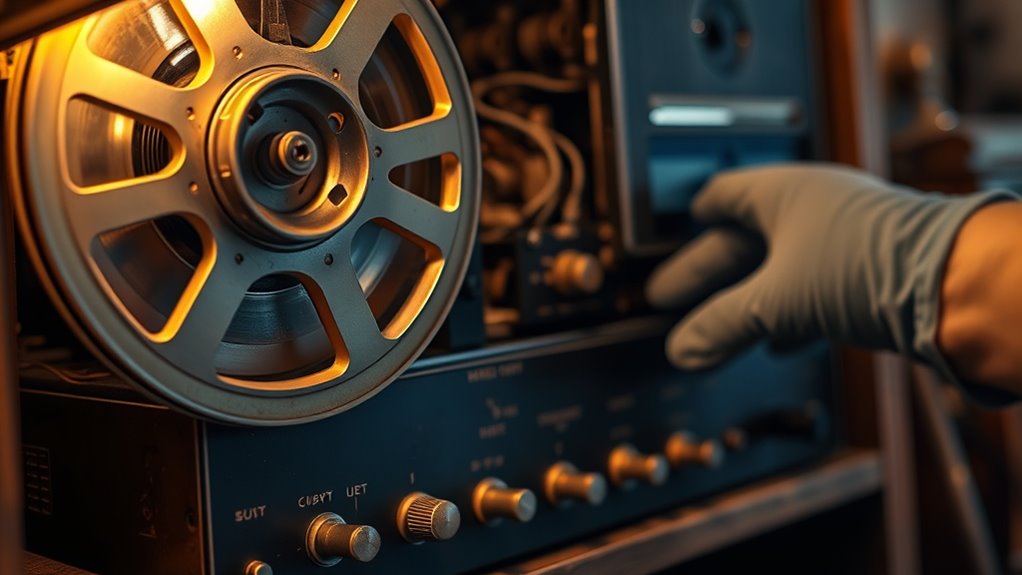
Restoring and Replacing Tubes and Valves
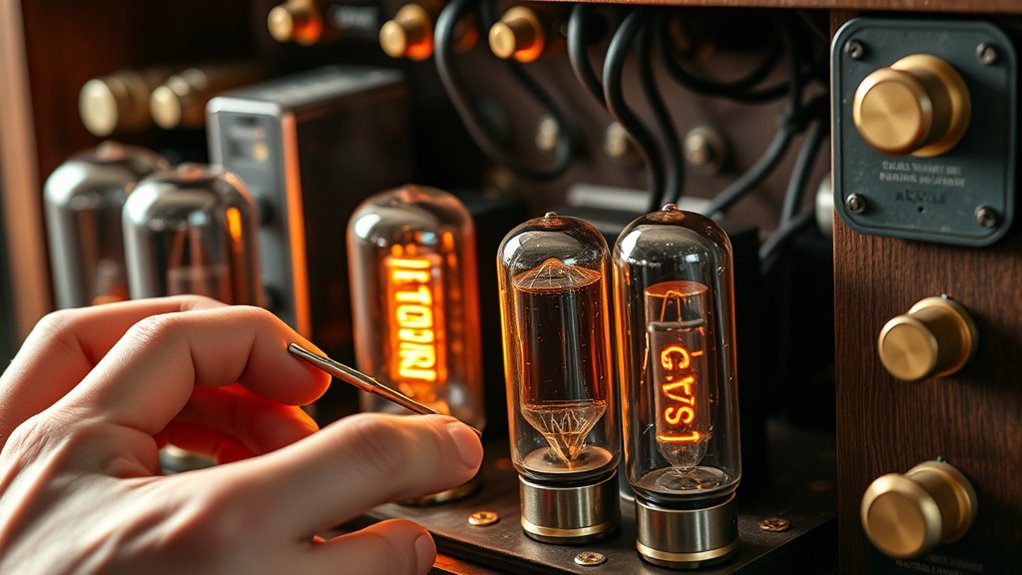
To restore your vintage audio gear, start by identifying faulty tubes through careful visual inspection and testing. Once you know which ones need replacing, use proper techniques to install new tubes safely and securely. A thorough testing process can help ensure that your equipment performs at its best and avoids potential damage. Additionally, consulting industry trends can provide insights into the latest best practices for maintenance and upgrades. Regularly maintaining your equipment can extend its lifespan and ensure consistent audio fidelity. For optimal results, consider using specialized tube testers to accurately assess tube health and performance.
Identifying Faulty Tubes
Faulty tubes often cause audio distortions, reduced volume, or sudden loss of sound, making it crucial to identify them quickly. To do this, you should perform thorough tube testing, which helps determine if a tube is failing. Look for physical signs like cracks, white or cloudy glass, or burnt spots, as these indicate faulty tubes. Listen carefully for buzzing, hums, or irregular sounds during operation, which may point to issues. Use a multimeter or a dedicated tube tester to check for emission and shorts. Remember, testing is more reliable than guessing. Proper diagnosis can also be supported by understanding the security measures that protect sensitive data in electronic components, ensuring your vintage equipment remains safe from electrical faults. Keep in mind that faulty tubes can vary in symptoms, so proper diagnosis is key to restoring your vintage equipment’s sound quality. Regular tube testing ensures your gear remains in prime condition. Additionally, understanding the Kia Tuning options can inspire upgrades that enhance your vehicle’s performance and aesthetics. When working with vintage audio equipment, it’s also helpful to be aware of the headphone types and connections to ensure compatibility during troubleshooting and repair. Being aware of cybersecurity vulnerabilities, such as potential hacking risks, can also help protect your valuable gear from digital threats during modern modifications or diagnostics. Proper testing procedures are essential to accurately identify faulty tubes and prevent unnecessary replacements.
Proper Replacement Techniques
Replacing tubes and valves correctly is essential to guarantee your vintage audio equipment performs at its best and stays protected from damage. First, power down and carefully disconnect your device, then locate the faulty component. When removing old tubes, handle them gently and avoid applying excessive force. Insert new tubes firmly, ensuring they seat correctly in their sockets. During replacements, check for any signs of damage or corrosion that could affect performance. As you work, consider circuit board repairs if you notice broken solder joints or damaged traces. Additionally, if the cabinet shows signs of wear, cabinet refinishing can restore its appearance and prevent moisture from affecting internal components. Proper replacement techniques preserve your equipment’s integrity, ensuring reliable operation and longevity.
Testing and Biasing
Before installing new tubes or valves, it’s essential to test their functionality and properly bias them to guarantee peak performance. Tube testing ensures your replacements are functioning correctly, preventing future issues. Bias adjustment fine-tunes the tubes, optimizing sound quality and prolonging lifespan. Proper testing and biasing help maintain the integrity of your vintage equipment. Incorporating proper maintenance practices can serve as a reminder of the importance of care and attention, much like nurturing your vintage gear. Keep detailed records of bias settings for future reference.
Troubleshooting Common Audio Issues

When vintage audio equipment produces no sound or distorted audio, troubleshooting begins with a systematic check of the most common issues. Start by inspecting your cable management; loose or damaged cables can cause signal loss or interference. Ensure all connections are secure and free of corrosion. Next, examine the user interface—buttons, switches, and dials—to confirm they’re functioning correctly and not stuck or dirty. Sometimes, a simple cleaning or reset restores proper operation. Also, verify that input sources are correctly selected, and volume controls are adjusted appropriately. If the problem persists, test different cables or inputs to isolate the issue. By methodically checking these key areas, you can identify and resolve many common audio problems efficiently.
Ensuring Proper Power Supply and Preventing Damage
Ensuring your vintage audio equipment receives a stable and appropriate power supply is essential for its longevity and ideal performance. Power surges can cause significant damage, so protecting your gear with surge suppressors is crucial. Voltage regulation helps maintain consistent voltage levels, preventing fluctuations that can harm delicate components. To safeguard your equipment, consider these practices:
- Use high-quality surge protectors to prevent power surges
- Install voltage regulators for stable voltage supply
- Avoid plugging into overloaded outlets or power strips
- Regularly inspect power cords and connections for wear or damage
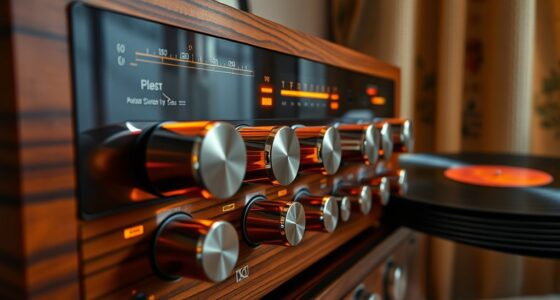
Restoring Audio Quality Through Calibration and Alignment

To restore excellent audio quality, you need to focus on calibration and alignment. This involves adjusting precise tone controls, aligning the signal path, and enhancing equalization. These steps ensure your vintage equipment produces clear, balanced sound.
Precise Tone Control
Achieving precise tone control is essential for restoring authentic audio quality in vintage equipment. Proper calibration ensures that your tone adjustment accurately reflects the original sound, maintaining the correct frequency balance. To do this effectively, focus on fine-tuning potentiometers and equalizer settings, avoiding overcompensation. Keep in mind that small adjustments can substantially impact sound clarity and fidelity.
Key aspects to consider include:
- Regularly verifying and calibrating tone controls
- Using accurate test signals for calibration
- Monitoring for any drift in frequency response
- Maintaining a consistent environment during adjustments
Signal Path Alignment
Proper signal path alignment is critical for restoring the original audio clarity of vintage equipment. Start by referencing the circuit diagram to understand the signal flow and identify key components. Use precise measurement tools like oscilloscopes and signal generators to check for any misalignments or deviations. Carefully calibrate each stage—ensuring tubes, capacitors, and resistors are functioning correctly. When sourcing replacement parts, prioritize authentic or high-quality substitutes to maintain original performance. Accurate component sourcing guarantees that the signal path remains true to its design, minimizing noise and distortion. Take your time during this process, adjusting and rechecking until the signal flows smoothly from input to output. Proper alignment results in clearer, more faithful audio reproduction, preserving the vintage sound you seek.
Equalization Optimization
Equalization optimization is essential for restoring the authentic sound of your vintage audio equipment. Proper calibration guarantees your system achieves ideal tone shaping and frequency balancing, bringing out the true character of your gear. Focus on adjusting the equalizer to eliminate unwanted peaks or dips, resulting in clearer, more natural sound. Fine-tuning these settings helps preserve the equipment’s original warmth and tonal richness. Keep in mind that small adjustments can markedly improve overall audio quality. By carefully aligning your equalization, you ensure your vintage pieces deliver balanced sound across all frequencies. Remember, each component influences the final tone, so patience and precise calibration are key. Regularly revisit your settings to maintain optimal audio performance over time.
- Achieve a natural, balanced sound signature
- Correct frequency response issues
- Enhance clarity and tonal warmth
- Prolong your equipment’s listening lifespan
Safely Storing and Protecting Vintage Equipment

To keep your vintage audio equipment in top condition, it’s essential to store it carefully and protect it from potential damage. Choose suitable storage solutions like sturdy, dust-resistant cabinets or padded boxes to prevent physical harm. Pay close attention to climate considerations; keep the environment cool, dry, and away from direct sunlight to prevent warping, corrosion, and mold growth. Avoid extreme temperature fluctuations and high humidity, which can damage delicate components. Ensure proper ventilation and use silica gel packs or dehumidifiers if needed. Regularly check on your stored gear for signs of deterioration. Proper storage not only preserves the equipment’s functionality but also maintains its aesthetic appeal, making it easier to restore and enjoy your vintage audio treasures for years to come.
Frequently Asked Questions
How Can I Identify Authentic Vintage Audio Equipment From Replicas?
You can identify authentic vintage audio equipment by verifying its authenticity through detailed inspection. Look for genuine manufacturer markings, serial numbers, and original logos, then cross-check these with official records. To avoid replica identification, examine the build quality, materials, and internal components. Authentic vintage gear usually shows signs of age but maintains consistent craftsmanship, helping you distinguish it from replicas that often lack the same detail or use modern parts.
What Safety Precautions Are Necessary When Working With Vintage Electronics?
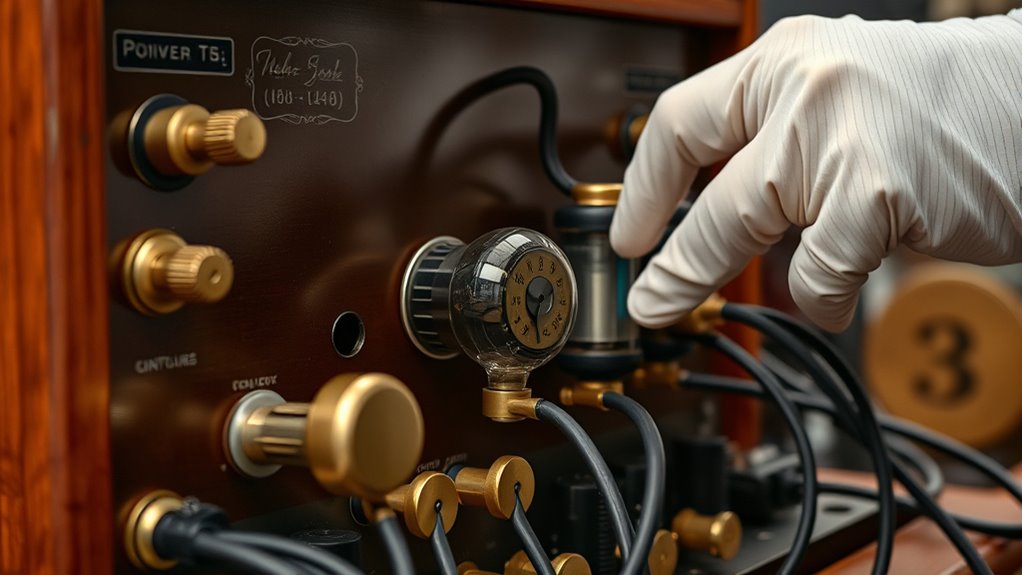
Think of working with vintage electronics as steering a treasure map; hidden dangers like electrical shock and component hazards lurk around every corner. Always unplug equipment before working on it, wear insulated gloves, and use a multimeter to check for residual voltage. Keep one hand behind your back to reduce shock risk, and work in a dry, well-ventilated space. These precautions protect you while you uncover the audio treasures.
Are There Specific Tools Recommended for Restoring Vintage Audio Gear?
You should use specific tools like a multimeter for component testing and cleaning supplies like isopropyl alcohol and soft brushes for cleaning procedures. A soldering iron with fine tips helps with delicate repairs, while a degaussing coil can help demagnetize parts. Always handle components carefully to prevent damage. These tools guarantee you accurately test and clean your vintage audio gear, keeping it in prime condition and restoring its original sound quality.
How Often Should Vintage Audio Equipment Be Serviced or Maintained?
Think of your vintage audio gear like a classic car—regular check-ups keep it running smoothly. You should perform a basic maintenance schedule every 6 to 12 months, including cleaning and inspecting components. For more complex issues or if you’re unsure, professional servicing is recommended annually or as needed. Staying proactive guarantees your equipment sounds pristine and lasts for decades, much like a vintage record that’s played with care.
Can Modern Components Be Used to Upgrade Vintage Audio Systems?
You can use modern upgrades in your vintage audio system, but you need to guarantee component compatibility. While upgrading with modern components can improve performance, it may alter the original sound or aesthetic. Carefully select compatible parts and consider consulting a technician to maintain authenticity. Balancing modern enhancements with the vintage character ensures your system sounds great while preserving its classic charm.
Conclusion
By staying attentive and proactive, you can keep your vintage audio gear singing smoothly for years to come. Regular maintenance and careful restoration act as the glue that holds your equipment’s sound quality together. Think of it like tending a garden—you’ll reap the rewards of rich, warm tones and timeless performance. With patience and dedication, you’ll ensure your treasured gear remains a vintage jewel that endures the test of time.