To upgrade your vintage turntable with modern components, start by replacing the cartridge with a newer, high-quality model for improved sound clarity. Rewiring the tonearm with audiophile-grade cables guarantees cleaner signal transfer. Consider enhancing mechanical parts like the platter or tonearm for better stability and tracking. Adding damping mats or upgrading the platter can further reduce vibrations. With careful installation and fine-tuning, you can markedly boost your turntable’s performance—if you continue exploring, you’ll discover detailed steps to optimize each upgrade.
Key Takeaways
- Replace the old cartridge with a modern, high-quality stylus and ensure proper alignment for optimal sound.
- Rewire the tonearm with audiophile-grade cables to reduce signal loss and interference.
- Upgrade mechanical parts like the platter or tonearm for better stability and tracking.
- Incorporate modern components such as energy-efficient power supplies to minimize electrical noise.
- Carefully install and fine-tune all upgrades using precise tools to maximize audio performance.

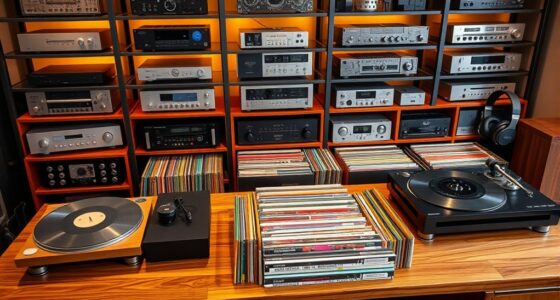
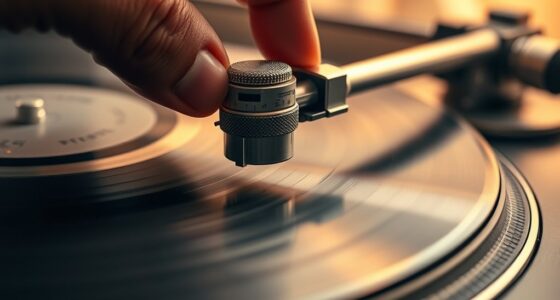
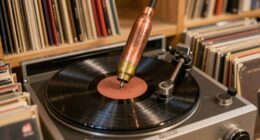
Upgrading a vintage turntable can substantially improve its sound quality and performance, making your listening experience more enjoyable. One of the most impactful upgrades is replacing the phono cartridge. The cartridge is the heart of your turntable’s sound, translating the grooves on your record into audio signals. Modern cartridges often feature better stylus designs, improved cantilevers, and more precise tracking capabilities, helping you achieve clearer, more detailed sound. When selecting a new cartridge, consider your preferred sound profile and compatibility with your turntable’s tonearm. Installing a new cartridge involves carefully aligning it to guarantee proper tracking and minimizing record wear. This step alone can dramatically elevate your listening experience.
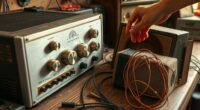
Another vital upgrade for vintage turntables is redoing the tonearm wiring, often called tonearm rewire. Over time, the internal wiring can degrade and introduce unwanted noise or reduce overall sound quality. Rewiring the tonearm involves replacing the old, often thin or oxidized wires with high-quality, audiophile-grade cables. This upgrade minimizes signal loss and interference, resulting in a cleaner, more accurate audio signal. When performing a tonearm rewire, you’ll need to carefully disconnect the existing wiring, route the new cables along the tonearm’s path, and connect them to the cartridge and the turntable’s internal wiring or output. It’s a delicate process, but done correctly, it guarantees your turntable transmits the purest sound possible. Additionally, some modern components, such as energy-efficient power supplies, can help reduce electrical noise and further improve audio fidelity.
Beyond the cartridge and wiring, consider upgrading the turntable’s platter or adding a damping mat to reduce vibrations and improve stability. Upgrading or replacing the tonearm itself with a higher-quality model can also make a noticeable difference. These modifications, combined with a precise cartridge and well-executed tonearm rewire, can transform a vintage machine into a high-fidelity player that rivals modern turntables.
When you’re making these upgrades, take your time to guarantee compatibility and proper installation. Use precise alignment tools to set your cartridge and tonearm angles, and double-check all connections before spinning your records. While some upgrades require technical skill, many can be done with patience and basic tools. Ultimately, investing in a quality phono cartridge and rewire not only preserves your vintage turntable but also reveal its full potential, delivering richer sound and a more satisfying listening experience.
Top picks for "upgrade vintage turntable"
Open Amazon search results for this keyword.
As an affiliate, we earn on qualifying purchases.
Frequently Asked Questions
Can I Upgrade My Vintage Turntable Without Technical Skills?
You can upgrade your vintage turntable without technical expertise, but be aware of potential DIY challenges. Simple upgrades, like replacing the cartridge or cleaning components, are manageable with basic tools and instructions. However, more complex tasks may require troubleshooting skills and careful handling. If you’re willing to learn, you can tackle minor upgrades yourself, but for advanced modifications, seeking professional help can prevent damage and guarantee ideal performance.
What Are the Most Cost-Effective Modern Components for Vintage Turntables?
Your vintage turntable can become a sonic powerhouse with budget-friendly options like replacing the cartridge or upgrading the belt. These DIY upgrade tips are easy and cost-effective, turning your setup into a modern masterpiece. Look for affordable tonearms, styluses, or even a new platter. These small tweaks deliver big improvements without breaking the bank, making your listening experience legendary and truly worth every penny.
Will Upgrading Components Affect the Turntable’s Original Value?
Upgrading components can impact your turntable’s collector value, but if you prioritize authenticity preservation, you can balance improvements with its vintage charm. Carefully choose modern parts that are reversible and blend seamlessly, ensuring the turntable retains its original appeal. This way, you enhance sound quality without substantially diminishing its worth, allowing you to enjoy better performance while maintaining the integrity that collectors value.
How Do I Ensure Compatibility Between New and Old Parts?
Imagine fitting a sleek, modern gear into a vintage machine—carefully check matching connectors to guarantee seamless connections, like puzzle pieces fitting perfectly. Verify voltage compatibility to prevent sparks or damage, like tuning an instrument just right. By researching specifications and consulting manuals, you ensure the new parts harmonize with the old, preserving both function and character. This way, your upgrade feels natural, like the turntable was designed for modern components all along.
Are There Risks of Damaging My Vintage Turntable During Upgrades?
Yes, there are risks of damaging your vintage turntable during upgrades. You might encounter issues with material compatibility, which can harm delicate parts, or compromise electrical safety if wiring isn’t handled properly. To minimize these risks, double-check compatibility before installing new components, and follow safety guidelines carefully. Use proper tools and consider consulting a professional if you’re unsure, ensuring your turntable stays in excellent condition.
Conclusion
Upgrading your vintage turntable with modern components breathes new life into your music experience. Did you know that over 70% of audiophiles prefer vinyl for its warm sound? By replacing outdated parts and adding contemporary features, you can enjoy crisp, clear audio without sacrificing character. So go ahead, make those upgrades, and rediscover your favorite records with a fresh, vibrant sound that blends the best of both worlds.